Wednesday, May 30, 2012

Cauliflower Pizza Crust?


When I saw this on Pinterest, I was immediately intrigued.  Over the last few months I have been working on cutting out gluten from my diet and the challenge with that is Pizza!! It's one of my favorite foods.  I tried Coconut Flour to make a pizza crust and wasn't thrilled with the results.  I kept stumbling across the Cauliflower Pizza Crust recipe and everyone who blogged about it said it was fabulous.. so what the heck?  I gave it a shot, twice. The recipe I used came from
I only used pizza sauce and mozzarella cheese, since that was all I had on hand.

Ingredients:
1 cup cooked "riced" cauliflower
1 cup shredded mozzarella cheese
1 egg beaten
1 tsp dried oregano
1/2 tsp crushed garlic
Olive oil
Shredded cheese and pizza toppings of your choice


Cut off leaves of cauliflower.  The recipe calls for cutting off the stems and I did not since I was using a food processor and head and stems taste similar to me. If you don't have a food processor, you can use a cheese grater.  Pulse cauliflower until it looks like a rice like mixture.  Be careful not to pulse too long, as you do not want to puree the cauliflower.  One head of cauliflower should produce 3 cups.  The other 2 cups can be stored in an air tight container and refrigerated for up to one week.


Place cauliflower in microwave safe bowl for 8 minutes (some microwaves are more powerful than others so adjust as needed).  There is no need to add water since there is enough natural moisture already in the mixture.  Preheat oven to 450 and spray a cookie sheet with non-stick cooking spray.


To make the crust, mix together the riced cauliflower, beaten egg and mozzarella cheese.  Add the oregano, crushed garlic,  garlic salt and mix well.  I used my hands as they are sometimes the best tools.

  
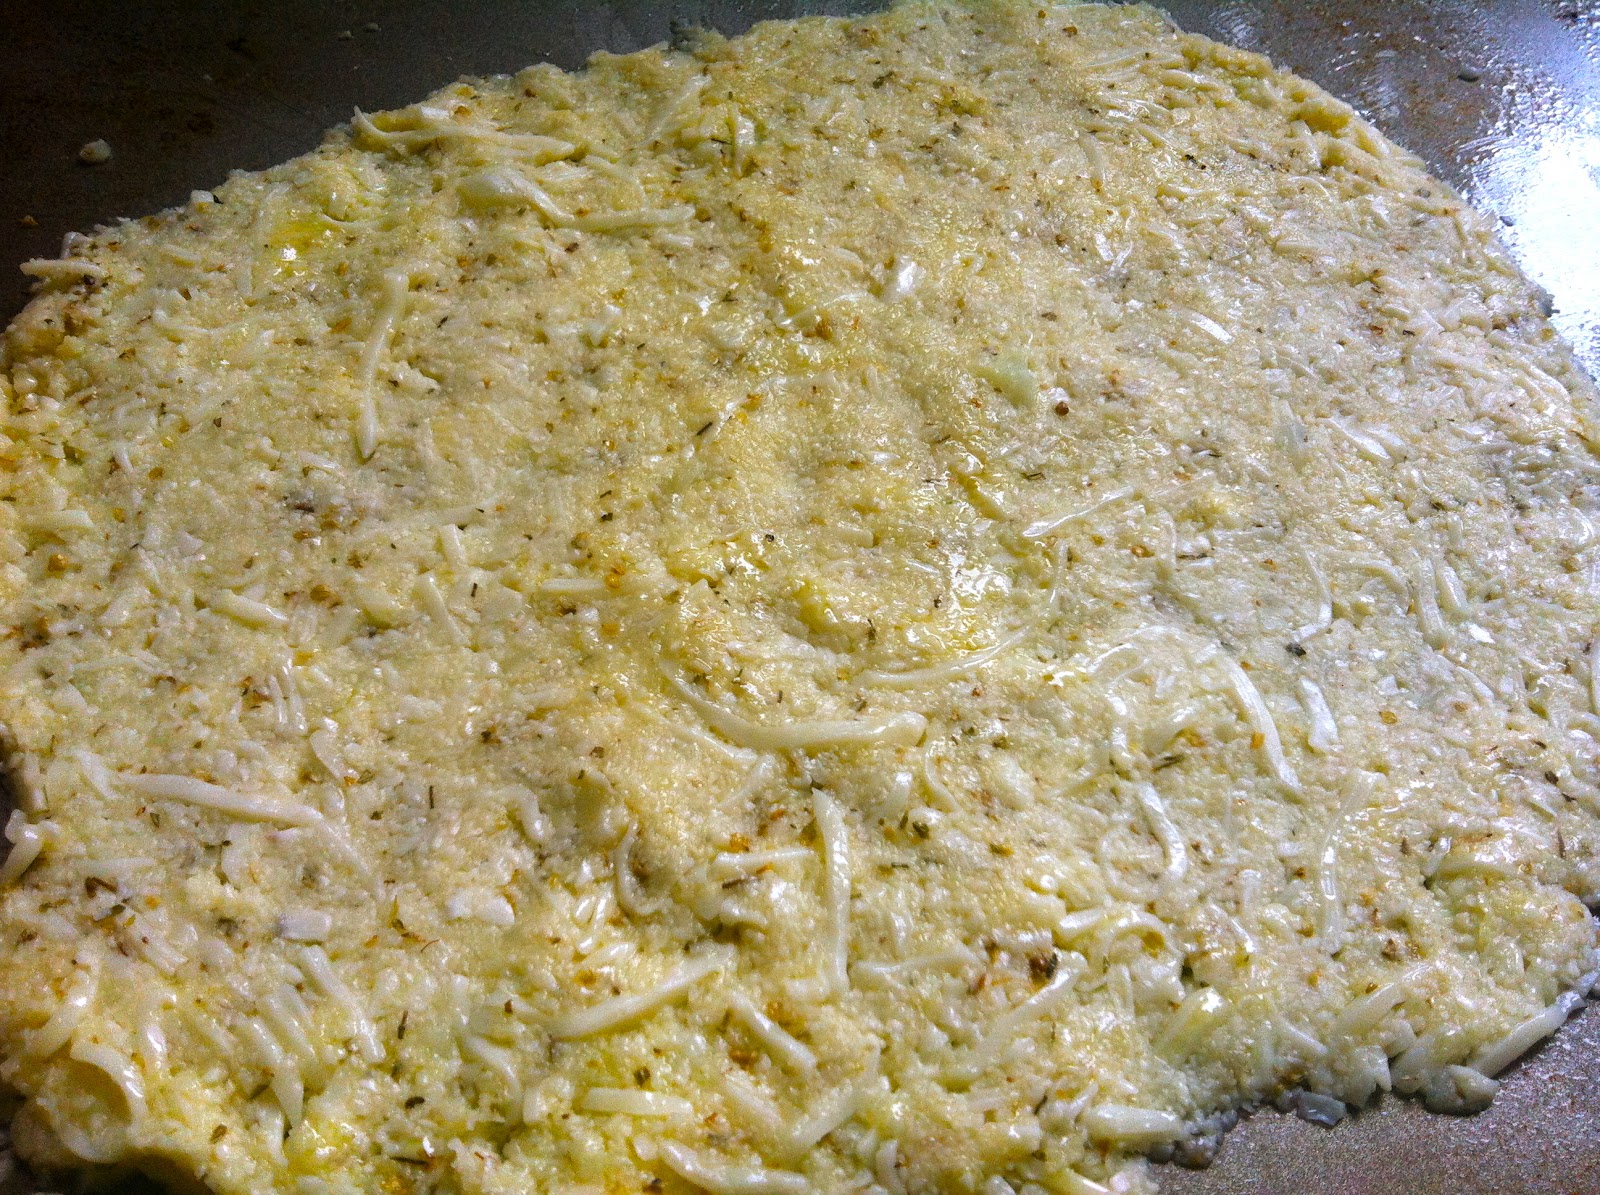
Transfer to a cookie sheet and using your hands, pat out a 9 inch round.   The first time I made this, It was too thick.  This time, I patted it down so it was really thin.  Apply olive oil lightly on top to help with browning.  


Bake at 450 degrees for 15 minutes.  My crust is almost burnt, but I really like it that way!


Add sauce, cheese and any other toppings you wish and broil for 3-4 minutes until cheese is melted.


If you are expecting the entire crust to be crispy, it is not.  The outside is crispy but the middle is not, so eating with a fork is the best bet!  


Monday, May 21, 2012

Pauline's Famous Hummus

My old roomie and good friend Pauline (@pkalil on Twitter) makes the best hummus in the world.  I had the pleasure of living with her for two years and she made it often.  After going our separate ways, I was more than disappointed with every hummus recipe or brand I tasted.  Pauline recently visited me and I demanded (ok, I asked nicely) if she would show me how to make her famous hummus once and for all.  We made a video, but I am still trying to edit it and since video editing is not my specialty, it's taking some time.  In the mean time, I will share her delicious hummus making secrets for you to enjoy.

Ingredients:
Garlic (1 or 2 cloves- depending on your preference)
1 can of Garbanzo Beans (more authentic the better)
1/2 cup Lemon juice (FRESH is best) 
1/3 cup Tahini 
Dash of Salt (optional)
Splash of Water (if needed)
Splash of Olive Oil (for texture)


Start with chopping your garlic cloves in the food processor.  I personally use one clove since I do not like too much garlic.  It's very important to put one ingredient in at a time throughout this process.


Add one can of garbanzo beans.  If you can find a Middle Eastern Store, they have the most authentic products.  I do not have one around me so I went with Whole Foods 365 brand.  Drain beans, but do NOT rinse with water. Pulse until mixed.


Add a half cup of lemon juice as processor is pulsing.  I've made this recipe with fresh lemon juice and store bought lemon juice, and fresh juice ALWAYS wins.  If possible, use fresh lemons. 


Good Tahini is essential to fantastic hummus, as I have learned from my past batches.  Again, a Middle Eastern store will sell authentic Tahini.   I found one from Lebanon at Whole Foods, so I went with it.  The only ingredient listed  is toasted sesame seeds, which is they way it should be! 
As Tahini is pulsing into the mix, add a dash of salt (optional).  If the hummus is thick, add a little bit of water until you get desired consistency.


Olive oil isn't required in this recipe, but if you want to add a dash for texture purposes, do it!  I personally like to add a little bit at the end, along with a dash or paprika and pine nuts.  Presentation is everything when you are serving to a crowd! 


Enjoy! ... and tell me what you think!!  


Wednesday, May 16, 2012

Cheesy Kale Chips

I was at Whole Foods one day and there were Kale Chip samples at the register.  My first thought was "GROSS!" ... but the curious foodie part of my brain took over and I helped myself to a sample. I  was more than surprised how much I liked them!  My next trip to Whole Foods I came across them in the snack isle and thought, "why not".. at 5.99 per bag.. I was hoping my experience was just like the first time.  Sure enough, I was in love with these Kale Chips and all of their delicious flavors, such as Ranch Quite Cheesy, and even Chocolate!  It was definitely worth it.  


Bag after bag being bought and consumed, I looked into making them on my own and the best recipe that was similar to the ingredients on the bag of the Alive & Radiant Foods brand was this blog: so I went with it.  


1 bunch curly kale
1 cup cashews
1 red bell pepper 
2 tbs. lemon juice
1/2 cup nutritional yeast
1 tsp sea salt - the package calls for Himalayan Sea Salt which I found at Whole Foods


My next mission was to find Nutritional Yeast, which I have never heard of until Kale Chips came into my life.  Turns out the "cheesy" taste is the Nutritional Yeast addition.. who knew?  Nutritional Yeast is used by many Vegans to obtain that "cheesy" taste.  I found it at Whole Foods in the Whole Body section of the store.  It's not cheap, 16 ounces will run you 17 bucks.

Rip leaves from stems and wash thoroughly, leaves need to be completely dry.  Soak cashews in water for an hour.  Combine cashews, red bell pepper, lemon juice, nutritional yeast and salt in the food processor and pulse until smooth.


In a bowl, combine dry kale and "cheesy mix" and mix.  Massage "cheesy mix" into kale.

Lie each leaf on parchment paper on a cookie sheet and bake at 200 degrees for 45 minutes.


They came out crispy, "cheesy", but I didn't think they were as good as the Alive and Radiant Brand at Whole Foods.  I will continue to experiment, maybe keep it a little more simple next time!  


A little FYI... I stored them in a tupperware-like container and when I went to open then to have one, they were soggy again... so I don't think they are meant to be stored without air.  


Saturday, May 12, 2012

Roy's Chocolate Souffle

Anyone who knows me knows I am a HUGE fan of Roy's Restaurant and specifically, the Chocolate Souffle.  I have been trying to master this delicious dessert for YEARS and have NEVER gotten it right.  I was making it in small ramekins and no matter what I did, it never turned out the way it was supposed to.  I learned two things in my journey,  the 3" ring mold was the only way to perfect this challenging chocolate dessert and the use of GOOD CHOCOLATE is a must!  I only use Guittard.


There are many recipes online for Roy's Chocolate Souffle
 but I like to go with the Master.
http://roysrestaurant.com/whatsnew/recipes/.


INGREDIENTS:
1 cup sugar
3 tbsp. corn starch
4 eggs plus 4 egg yolks
12 tbsp. unsalted butter
8 oz. semisweet dark chocolate (GOOD QUALITY)

PREPARATION:
In a mixing bowl, combing sugar and corn starch.  In a separate bowl, mix eggs and yolk together.  In a saucepan, (I use a make shift double broiler) bring butter to a simmer along the edges.  Add chocolate to butter and melt.  Combine the chocolate mixture with the sugar and cornstarch and mix thoroughly.  Add eggs and mix at a low speed until sugar is dissolved and mixture is smooth.  Refrigerate overnight in a bowl and bake at 375 degrees after refrigeration.  Every oven is different and I have to bake at 400 for a few minutes longer to get the desired results.  


   Mix sugar and cornstarch


   Melt butter in double broiler


Add chocolate to butter


Combine chocolate mixture with sugar and
cornstarch mix, wait a few minutes and add 
egg mixture and refrigerate overnight.


Spray rings with non stick cooking spray inside, 
wrap parchment paper inside and spray again.  Fill 
rings 2/3 with filling and bake for 18-30 minutes.  


This is my end result and I had some glitches.
Since I am not Martha Stewart, 
I am going to share them here. 


This is what happened the first time 
I used the rings.


This was the second time, and a lot less filling fell out.  
I refrigerated it much longer this time and it 
was more of a solid, which was the only difference.


This is the end result from the Master, the original 
Roy's Restaurant in Hawaii Kai.  I have faith, 
I will get it this perfect one day!  


Sunday, April 8, 2012

Pinterest Has Motivated Me To Pursue My Passion... FOOD!!!

I have never been much of a cook, but I LOVE to Bake.  Since discovering Pinterest, (http://pinterest.com/karink57)  my Recipe Board grows by the day with dishes from the amazing, creative Bloggers all over the web.  Pinterest has gotten me excited to get into the kitchen again and whip up some of these succulent delightful dishes!  I have decided to share some of the more extraordinary recipes I make along with a photo journal of the process.  I will be sharing all kinds of foods, desserts and even the occasional spirit, and will definitely give credit where credit is due!

Stay tuned for all things yummy!